Web Application file
This use case example shows you how to create a web application file, set its default URL, and view it in the web viewer panel in Celbridge.
- Create a new Celbridge project (or use an existing one).
-
Right-mouse click in the file explorer and choose to add a new Web Application file named wikipedia.py:
-
choose menu: Add | Web application file (.wbeapp)
- enter the file name as wikipedia.webapp
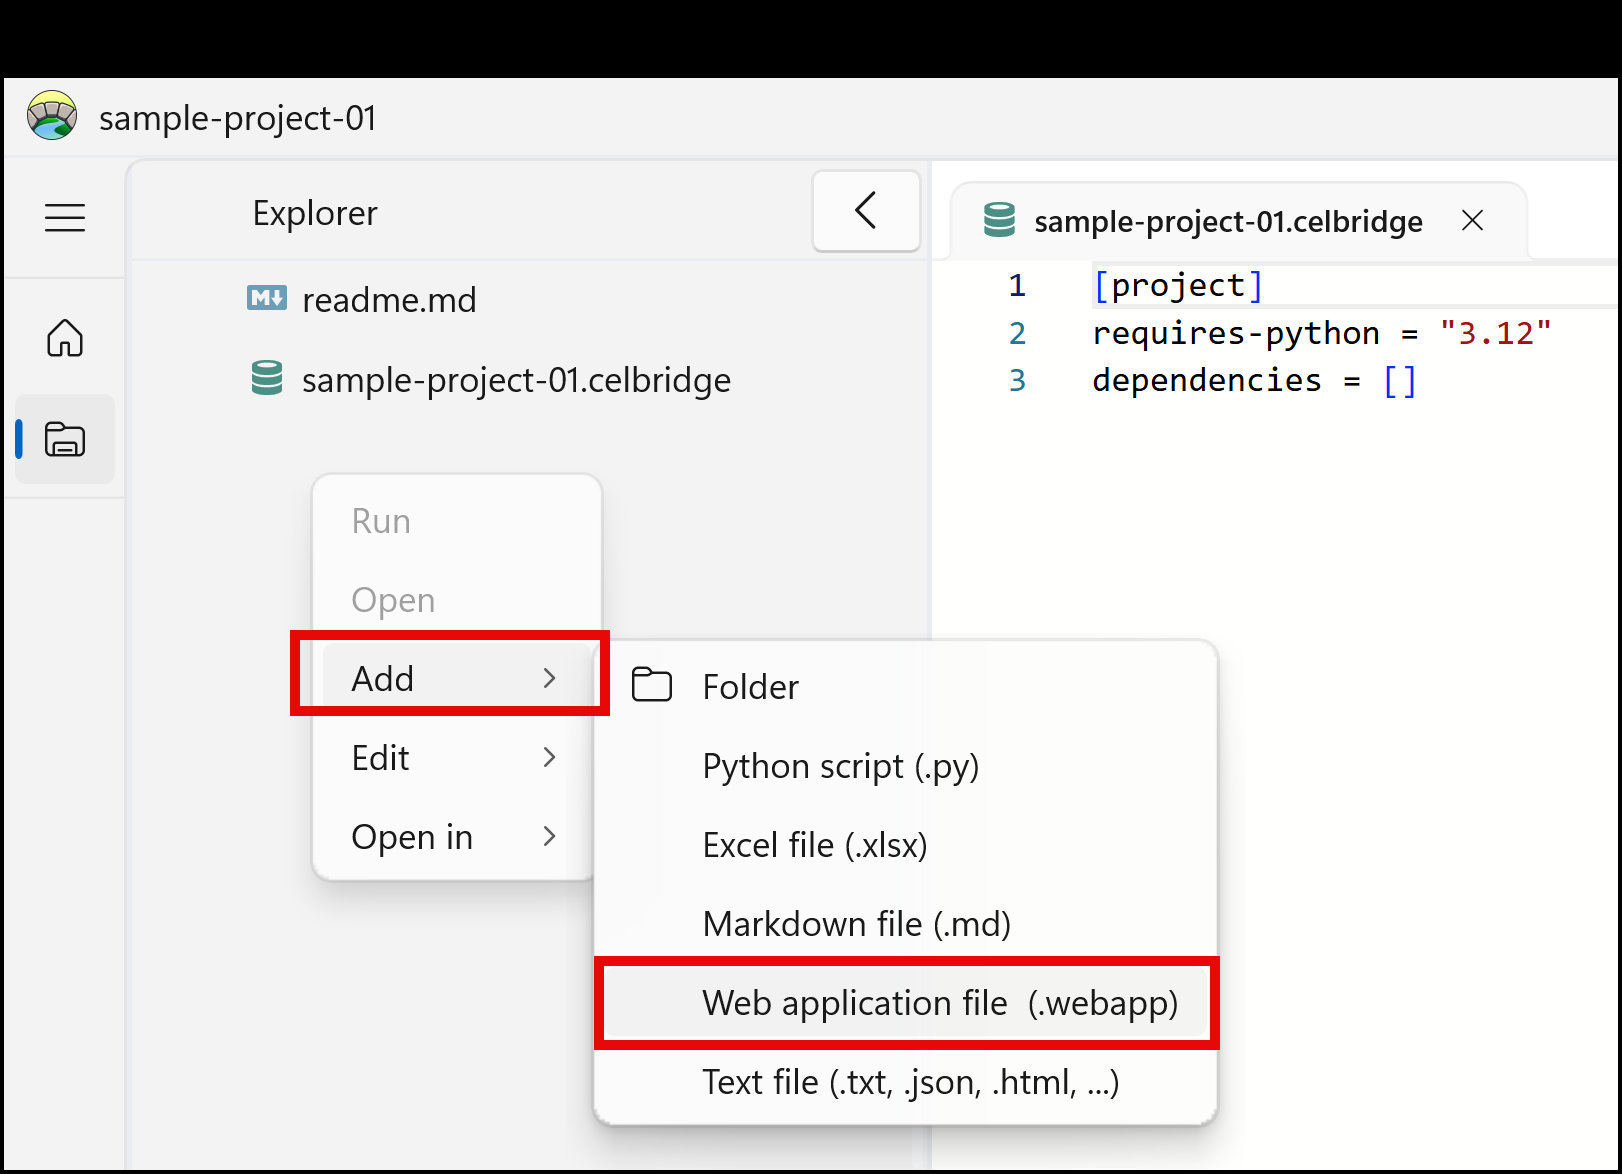
- The new Web Application file should be created and appear in the file explorer panel.
-
Edit your new Web Application file, by double clicking on file wikipedia.webapp in the file explorer panel:
-
the file should open as an empty web viewer, as a new tab in the Documents panel.
-
In the Inspector panel, for the Start URL property, type https://www.wikipedia.org/
- Once you enter your URL (such as pressing Tab or Enter), you should see the Wikipedia home page rendered in the web view
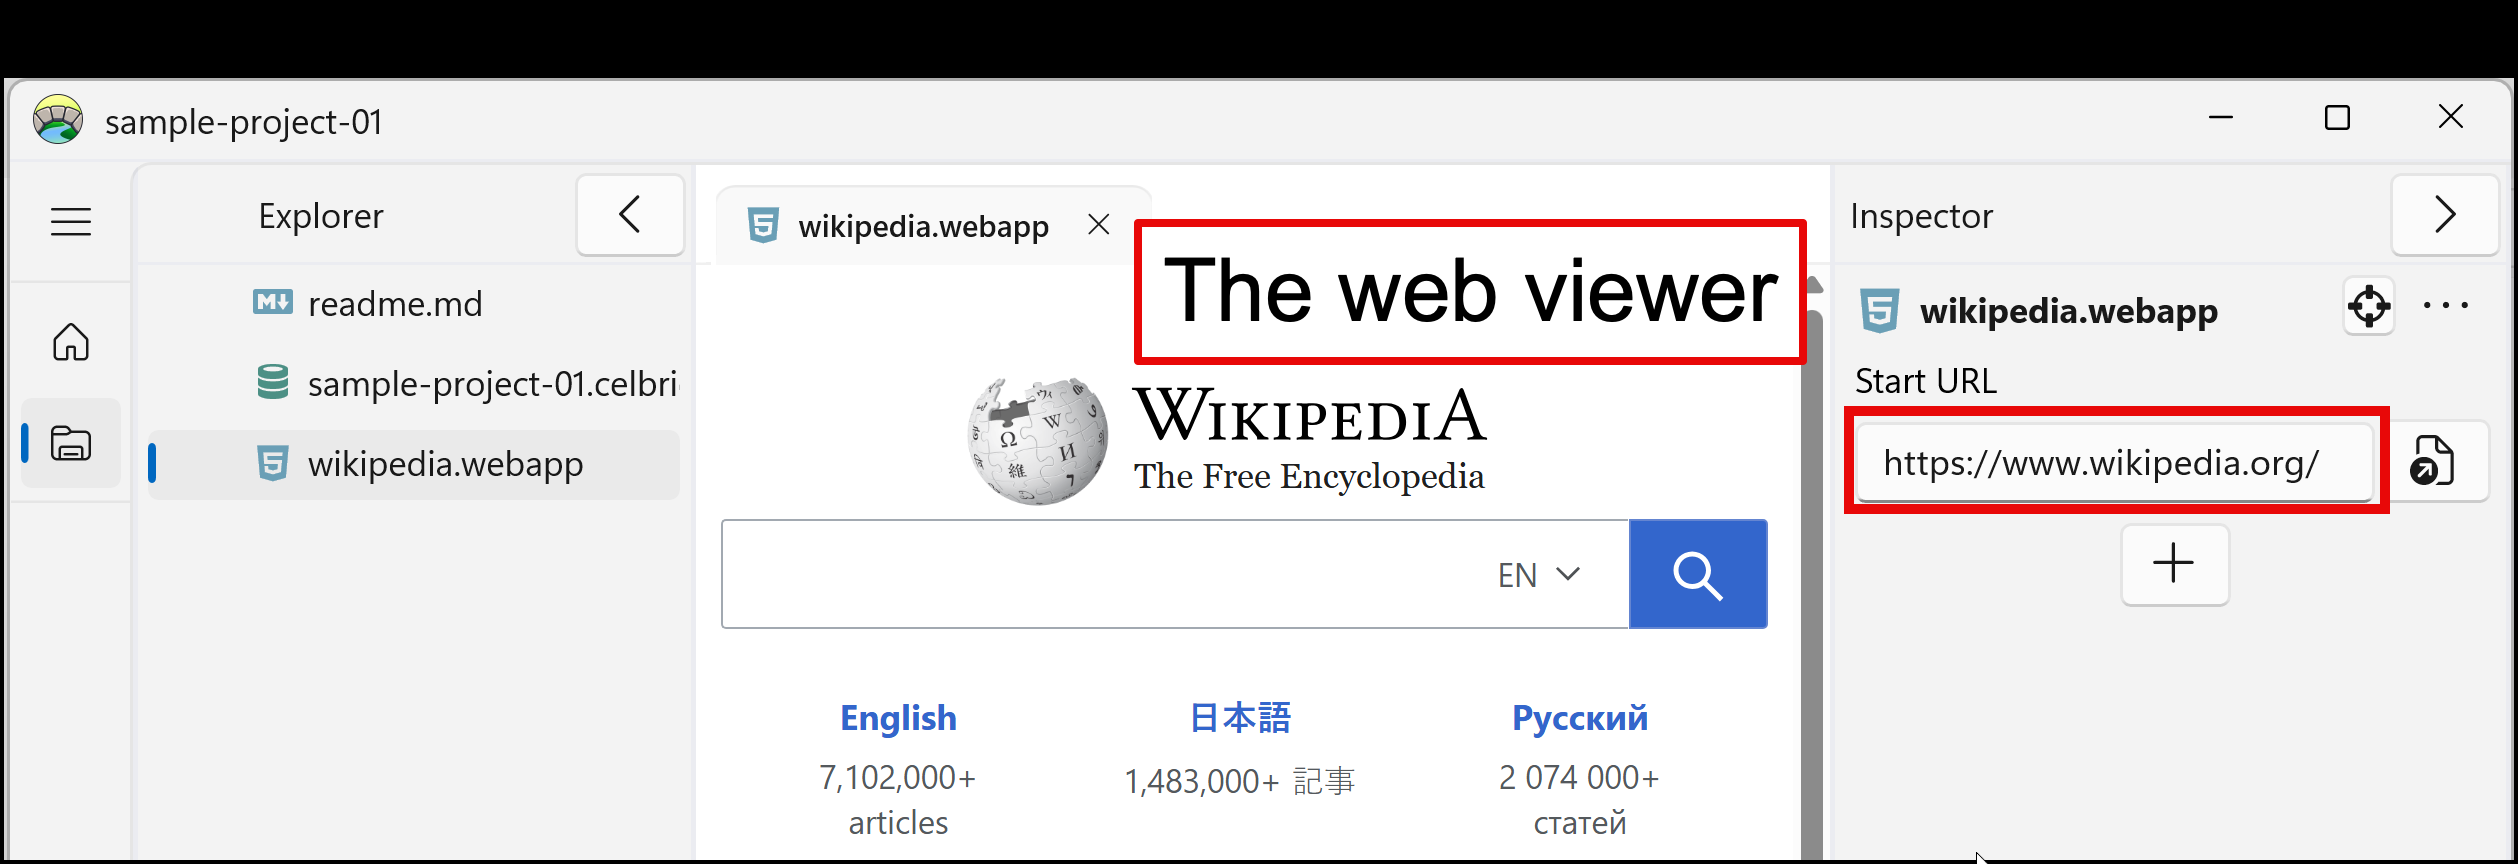
% :width: 75% % :alt: Screenshot showing Console output of running hello.py script
Congratulations - you've created and set a URL for a Web Application file using Celbridge!
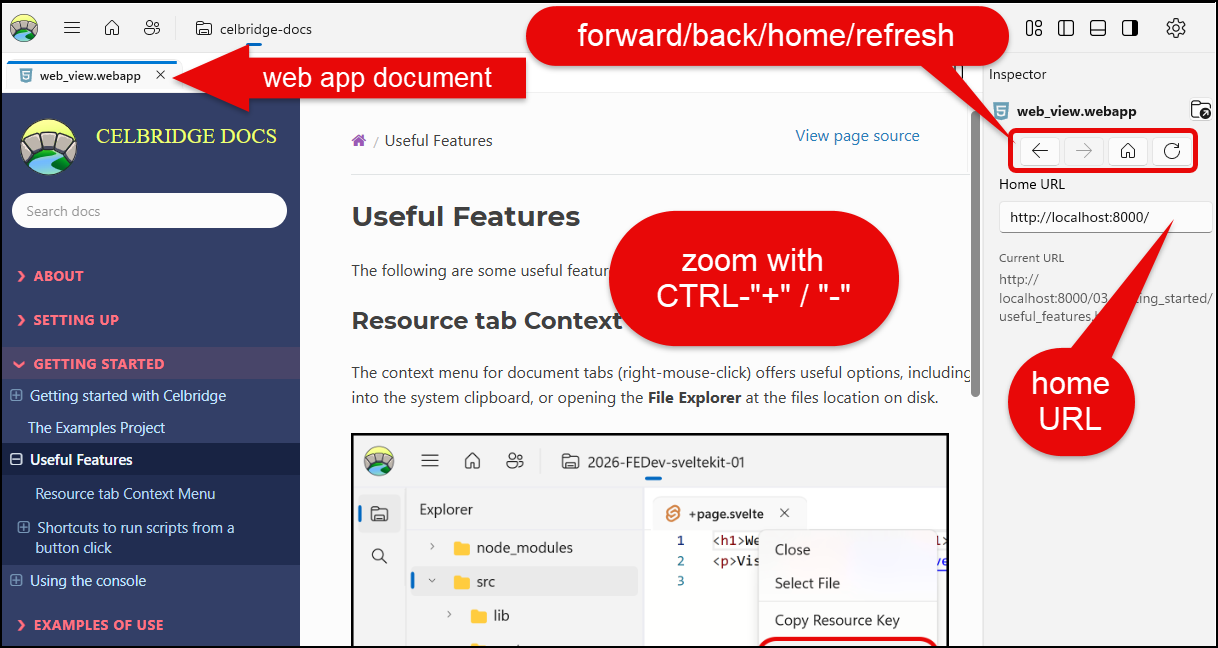
You can ZOOM using keys CTRL+ and CTRL-. In the Inspector there are arrow buttons to move forward and back in your page linking history. Also a button to reload the home URL, and a refresh button for the current page being viewed.
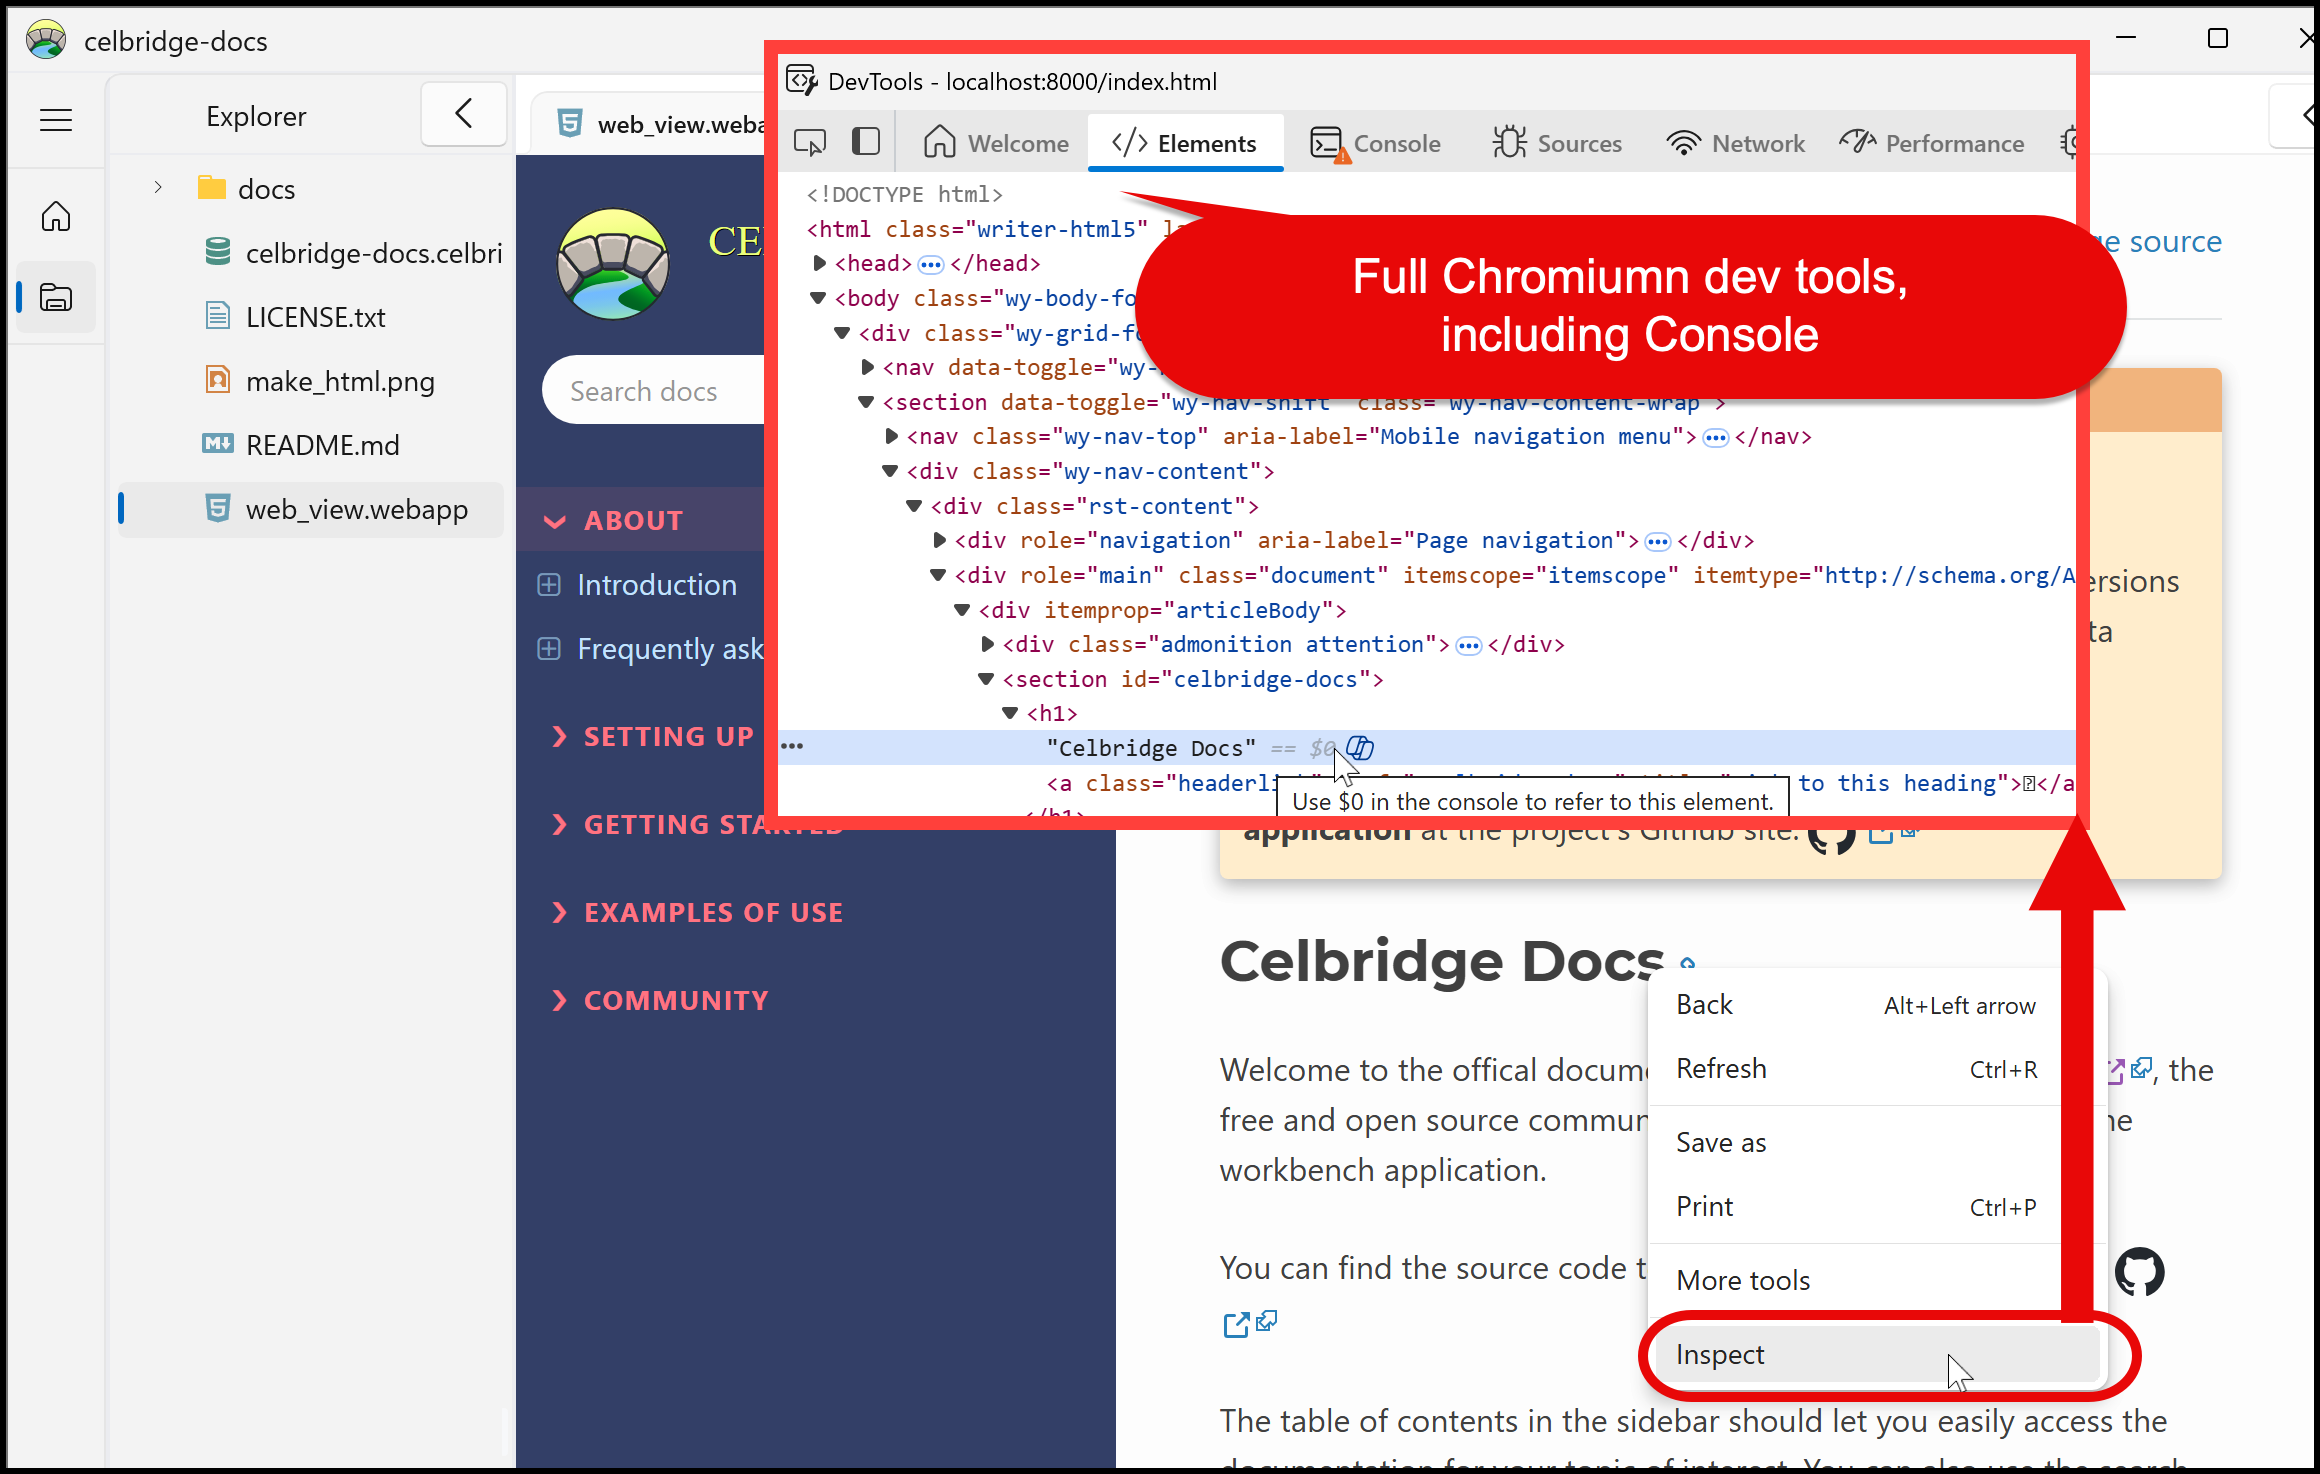
Chromium Console
The web view in Celbridge includes the Chromium dev tools. The dev tools include panels such as: - DOM Inspector - JavaScript Console
The screenshot below illustrates the dev tools being displayed by right-mouse clicking over an web page element and selecting Inspect to open a pop-up Chromiumn dev-tools window: