Getting started with Celbridge
Welcome to Celbridge. This part of the docs will help you get to know your way around the application.
Note
This document assumes you’ve already successfully installed Celbridge. For detailed installation instructions, see the Installation page.
The Basics
Celbridge has two main interfaces: the home menu, where you create and open projects, and the Celbridge editor, where you work directly in a project.
If you have no existing project, the home menu will open automatically when Celbridge is launched. You can switch between the home menu and Celbridge editor using the buttons in the navigation bar to the left of the main interface.
Creating a Project
You can create and open Celbridge projects from either the home menu, or the hamburger menu at the top of the navigation bar to the left of the main interface.
Let’s create a project from the home menu.
Open the home menu.
Click
New project.Name your project.
Note
Currently, project names cannot contain spaces.
Choose a folder to place your project in, and select whether you want Celbridge to create a subfolder with the same name as the project.
The steps to create a project from the hamburger menu are identical: just click the menu and select New project.
The Celbridge Editor
Let’s explore the Celbridge editor.
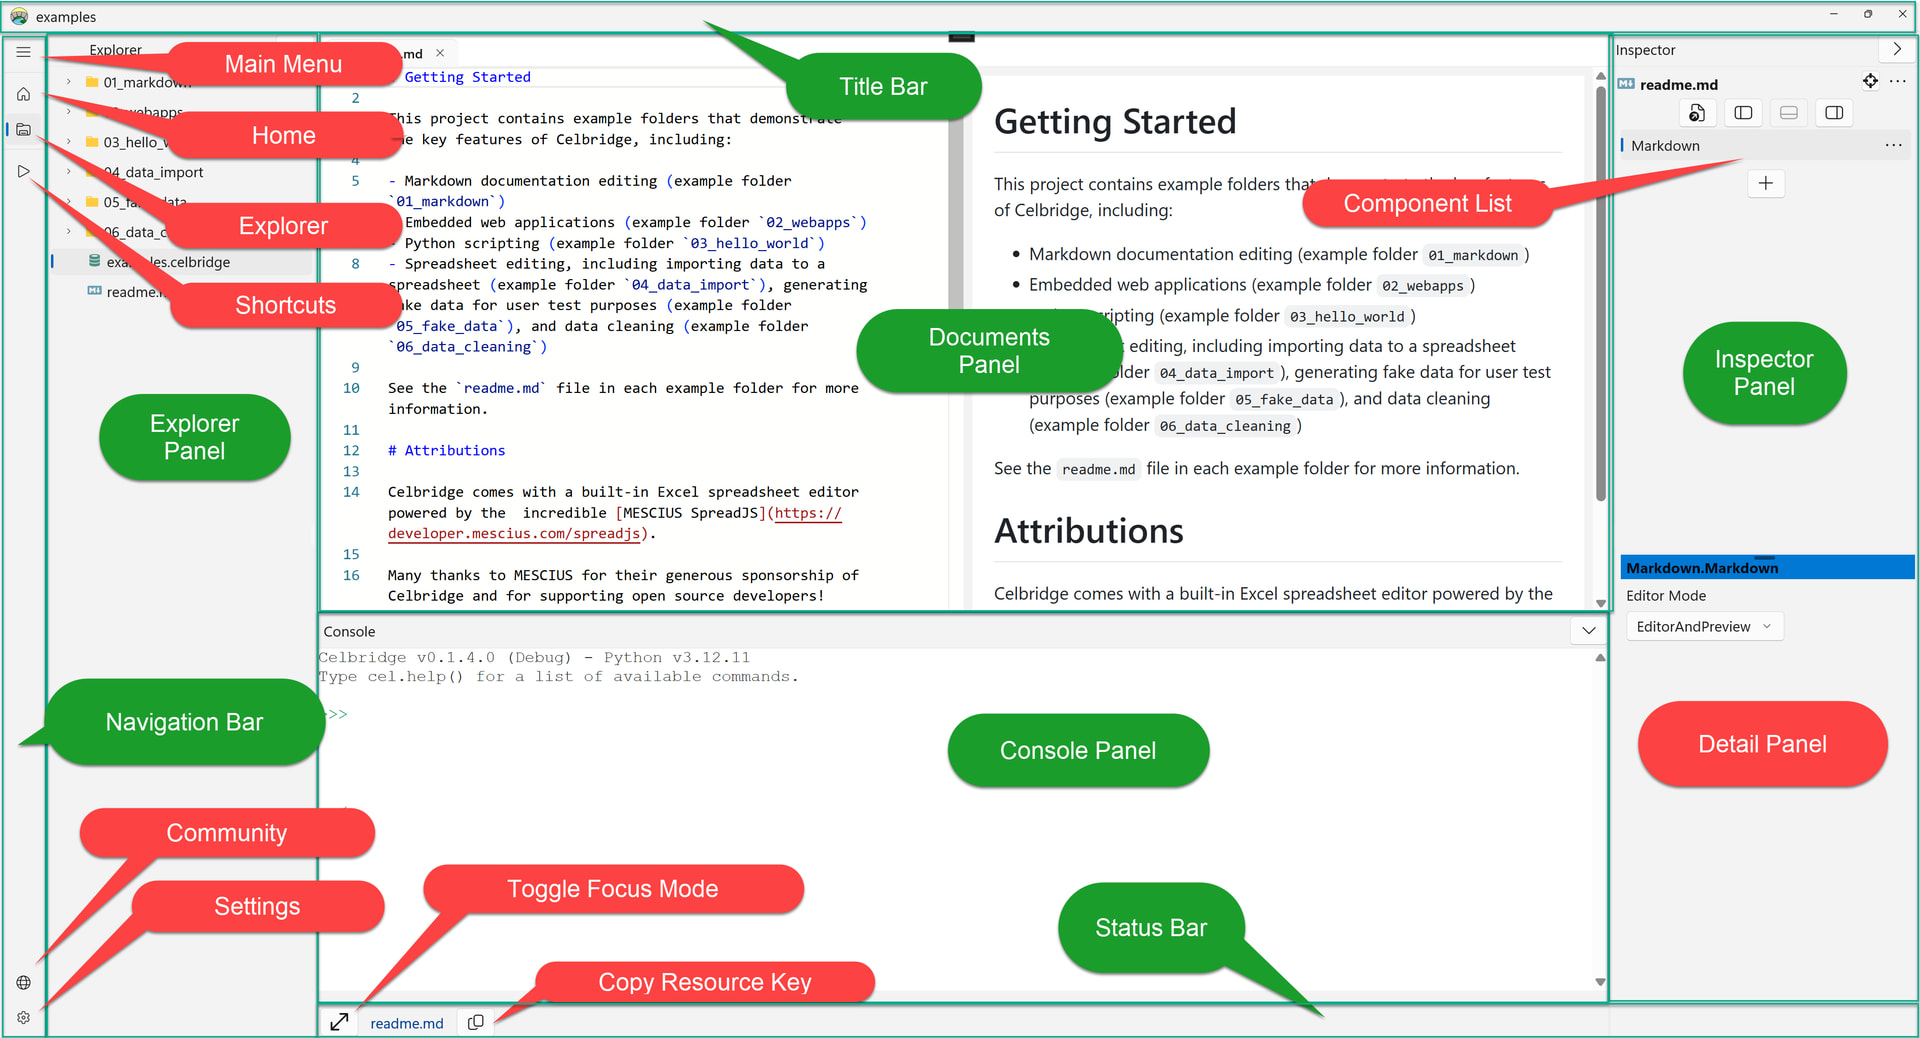
Open the project you created in the Creating a Project step. From left to right, top to bottom, the sections of the Celbridge editor are as follows:
Explorer Panel
The explorer panel lists all files in the project. Add existing files by dragging and dropping them from the Windows File Explorer.
Run Python files using the
Runoption. Right-click on a Python file in the Explorer panel and selectRun. The Console panel prints any output from the script.Open a file by right-clicking it and selecting
Open.Perform various options on files using the
Editoption.Add a new file or folder by right-clicking anywhere in the Explorer panel and selecting an option from the
Adddropdown. The supported options are a folder, Python script, Excel file, Markdown file, web application file, or plain text file of any format.Open a file in the Windows File Explorer or the associated system application using the
Open inoption.
Documents Panel
View and edit open documents in the documents panel. Double-click on a file in the explorer panel to open it in the documents panel.
You can tab between multiple open documents.
Celbridge includes a fully-featured text editor based on Monaco , the editor used in Visual Studio Code .
The text editor supports all popular text formats and programming languages.
The documents panel also provides a live preview for Markdown.
Note
Right-mouse clicking over a document tab will show the document’s context menu:

Inspector Panel
The inspector panel allows you to perform document-specific actions. For example, you can run a Python script that edits the data of a spreadsheet from the spreadsheet inspector panel.
Console
The console is Celbridge’s integrated Python interpreter. Here you can run Python commands and scripts.
the console has its own documentation page: