Useful Features
The following are some useful features of Celbridge.
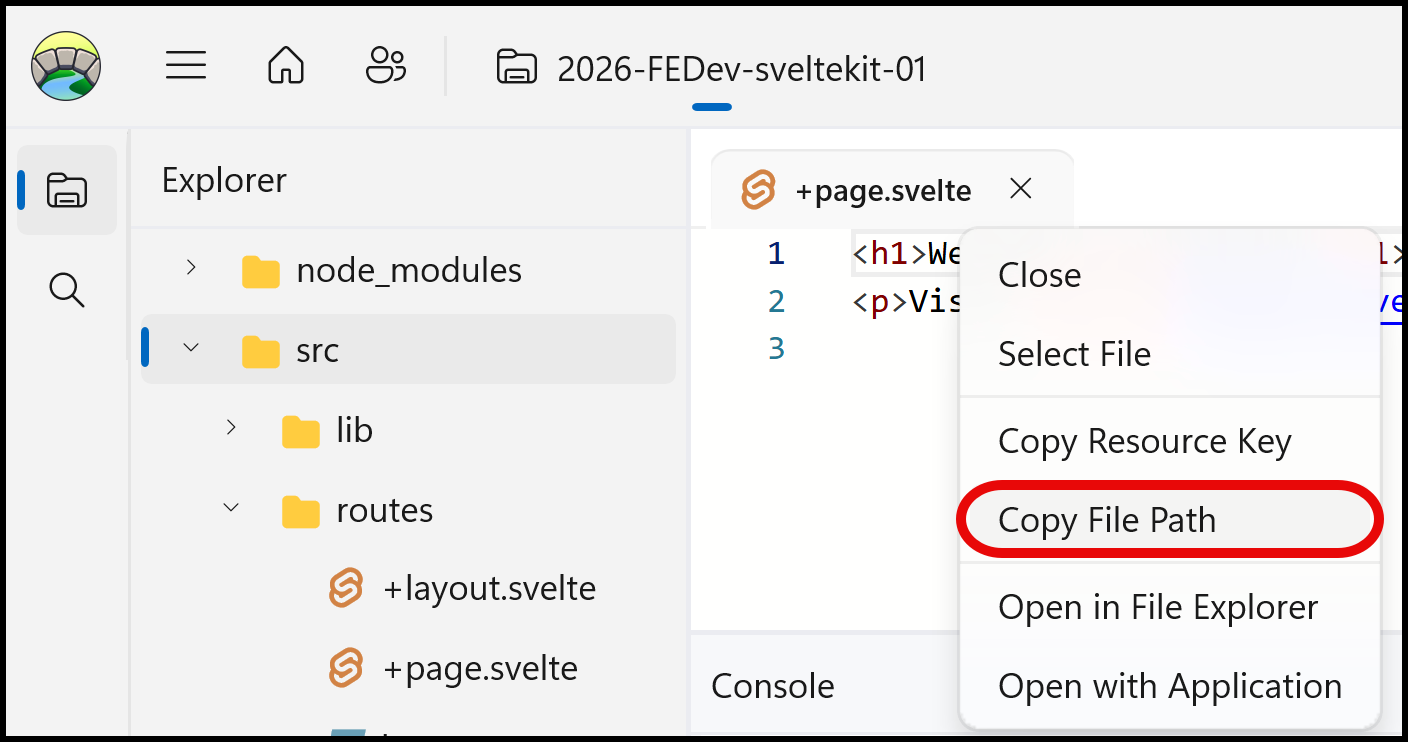
Resource tab Context Menu
The context menu for document tabs (right-mouse-click) offers useful options, including copying the file path into the system clipboard, or opening the File Explorer at the files location on disk.
Shortcuts to run scripts from a button click
You can add shortcut definitions in the project’s .celbridge file. These shortcuts declare a Python script to be executed when the associated shortcut button is clicked.
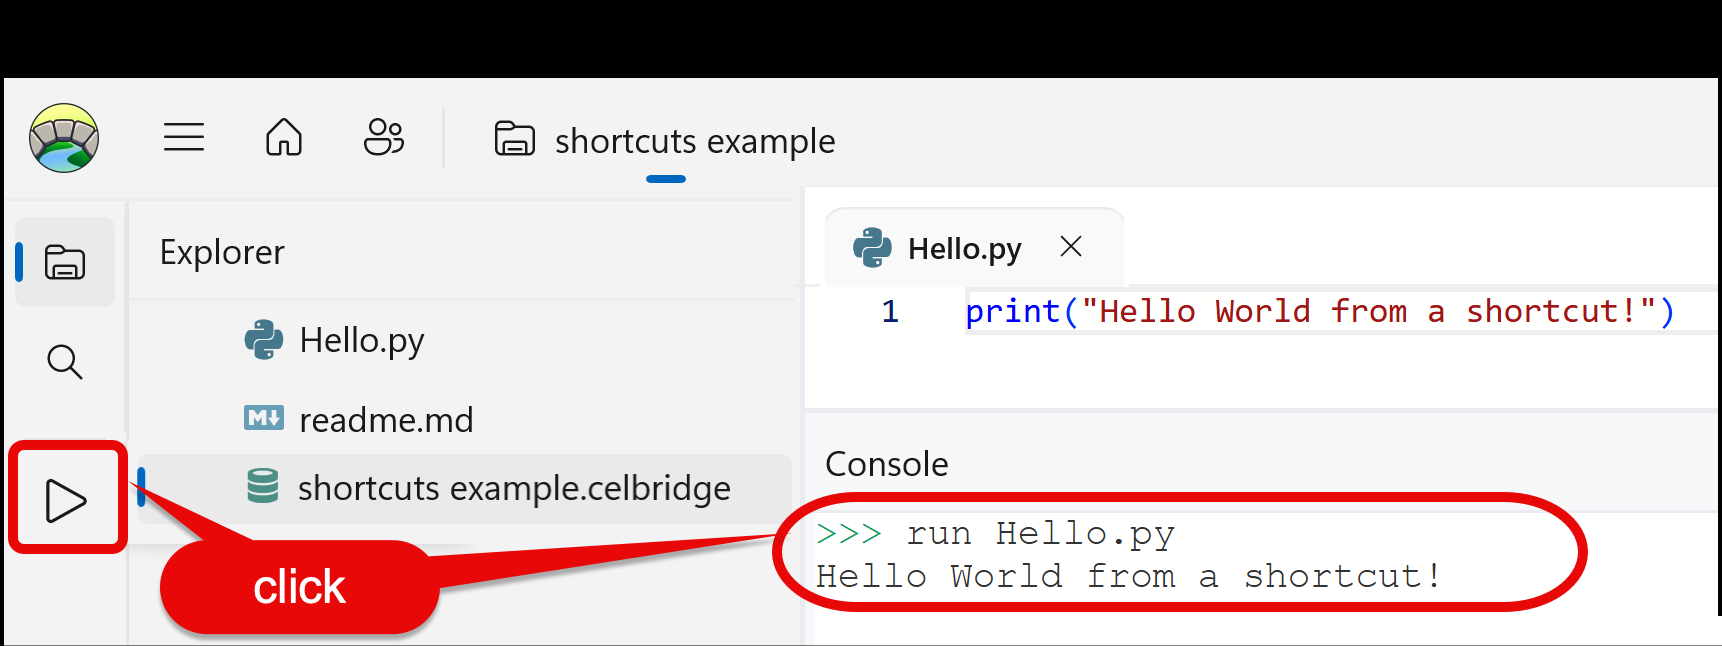
Edit your project’s .celbridge file, adding a [[shortcut]] entry for each button you wish to define. This screenshot shows the declaration for a shortcut will run the script Hello.py when clicked:

In the
.celbridgefile first write[[shortcut]](note the double square brackets):[[shortcut]]
next declare the name for this shortcut. The name becomes the tooltip text, if no tooltip is explicity defined. The name is also used when creating a menu of shortcuts (see further down this page). The name has to be at least one alphabetic character:
name = "say hello"
next declare the script to be executed, between triple single-quotes. If the script is in a subdirectory, use double quotes around the path, such as
"samples/Hello.py":script=''' run Hello.py '''
Note
Note: Since you are editing the project’s “.celbridge” configuration file, you’ll be prompted to reload the project after creating or editing any shortcuts…
When the button is clickled, the associated Python script is executed in the IPython console:
Shortcut sub-menus
If you want to have several script shortcuts, related shortcuts can be grouped into menus off the same button.
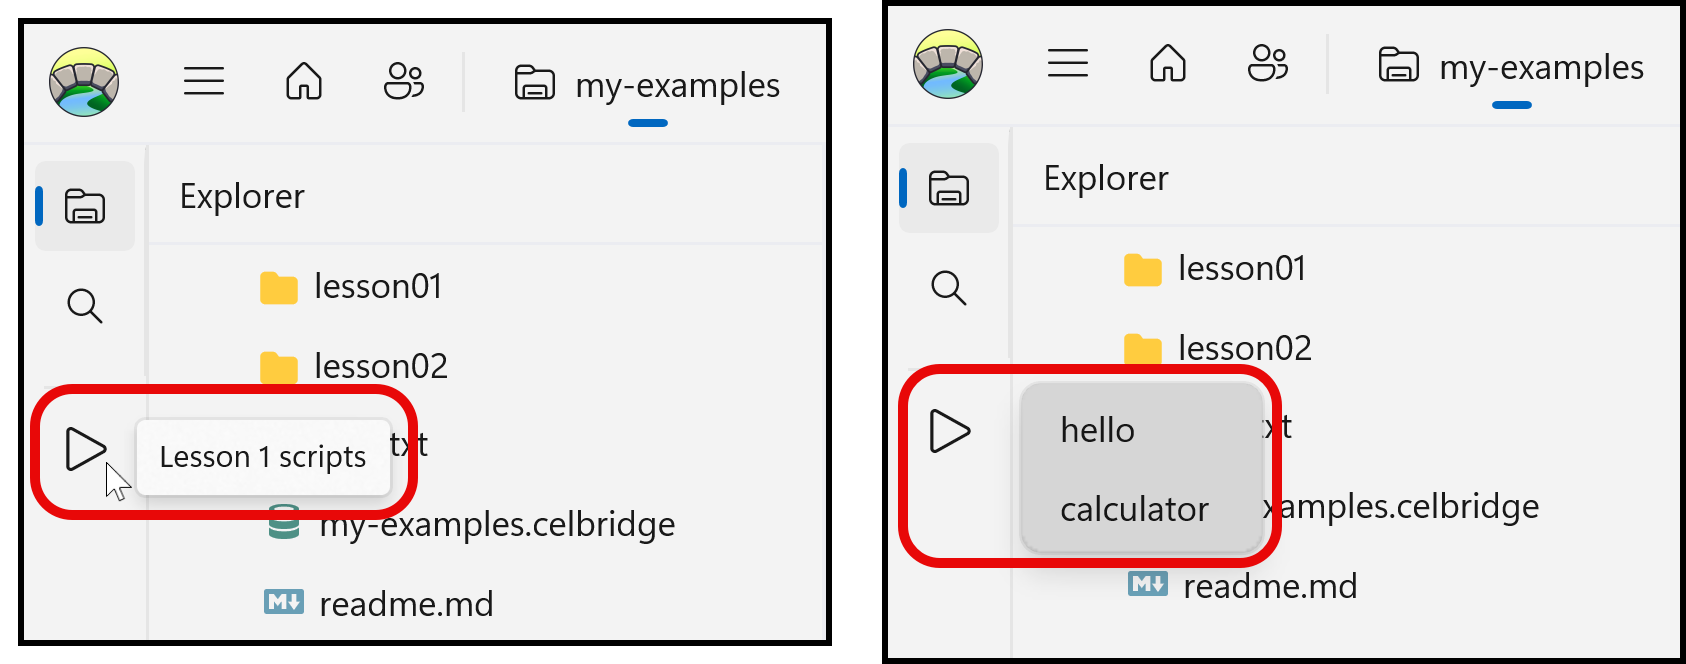
To create a menu of shortcuts you first declare a shortcut with no script, whose name will link all those for the menu. Here we are going to link sevreal shorts all starting with the name Lesson 1 scripts:
[[shortcut]]
name = "Lesson 1 scripts"
icon = "Play"
Then follow this no-script shortcut with several shortcuts, whose name starts with the same name (Lesson 1 scripts) followed with a forward slash and the script name. Here two menu items are declared, for hello and calculator:
[[shortcut]]
name = "Lesson 1 scripts/hello"
script = '''
run "lesson01/Hello.py"
'''
[[shortcut]]
name = "Lesson 1 scripts/calculator"
script = '''
run "lesson01/Calculator.py"
'''
If the first (no-script) shortcut doesn’t delcare a tooltip, then this name will be the tooltip for the button. When the button is clicked, the menu of shortcuts is displayed, each of which can be individally clicked to run their associated script:
Shortcut tooltips
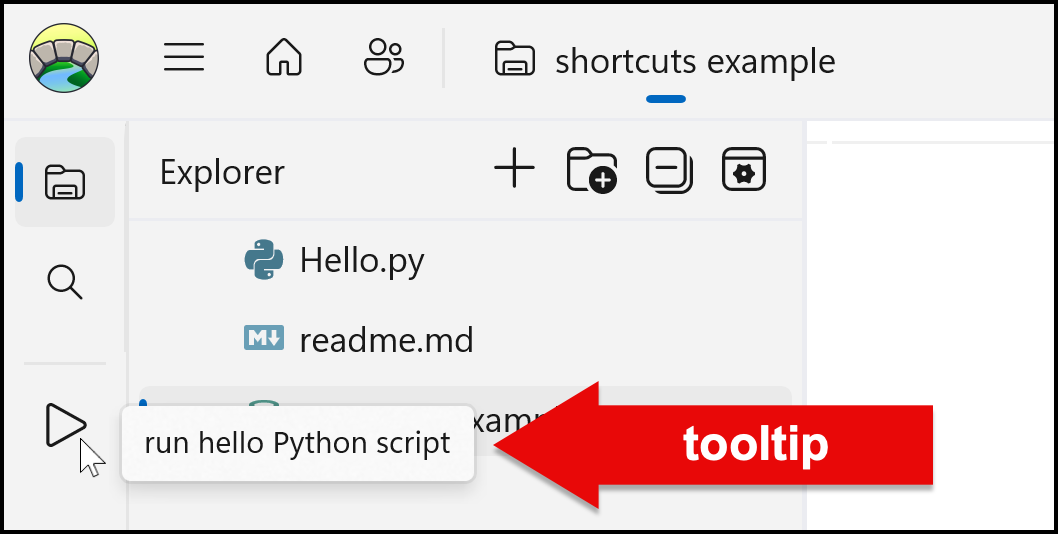
You can add a tooltip line to declare a message to display when the mouse hovers over the button:
[[shortcut]]
name = "say hello"
tooltip = "run hello Python script"
script='''
run Hello.py
'''
Note
Note: Since the name line defaults to be the tooltip, in most cases this isn’t useful. However, when creating menus of shortcuts, it can use userful to allow you to have a short and simple shared name (e.g. lesson1) but a more complex tooltip description (e.g. Lesson 1 scripts (beginner)) for the button.